ARP Spoofing: How Attackers Eavesdrop on Your Network
Ever wondered how an attacker can secretly eavesdrop on network traffic or even manipulate data without anyone noticing? One of the sneakiest ways to do this is through ARP spoofing. The Address Resolution Protocol (ARP) is what helps devices in a local network find each other, but here’s the catch—it wasn’t built with security in mind. That means a hacker can easily trick devices into sending their data to the wrong place, setting the stage for a man-in-the-middle (MITM) attack. In this post, we’ll break down the ARP protocol, how it works and how it can be manipulated to conduct MITM attacks.
1. What is ARP?
The Address Resolution Protocol (ARP) is a Layer 2 protocol that maps static 48-bit MAC addresses to dynamic 32-bit IP addresses. This mapping allows devices on a Local Area Network (LAN) to determine the correct MAC address when sending packets to a specific IP address, enabling seamless communication within the local network.

There are two main types of ARP messages: ARP Request and ARP Reply. When a device needs to find the MAC address associated with an IP address, it sends a broadcast ARP request asking, "Who has this IP address?" The device with that IP responds with an ARP reply, providing its MAC address.

To improve network efficiency, devices maintain an ARP table, a cache that stores IP-to-MAC address mappings. This table acts as a lookup reference, allowing devices to quickly resolve MAC addresses without repeatedly sending ARP requests.
2. Hands-On with ARP
You can see complete ARP communication using the arping tool:
$ sudo arping -c 1 192.168.1.13
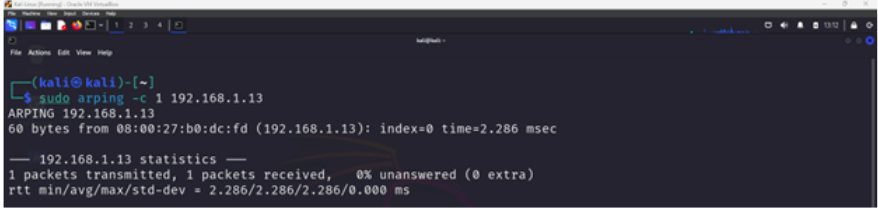
This will send an ARP request from your device to the target IP address, which is then replied by the target device. You can run Wireshark to capture the traffic by filtering with arp.
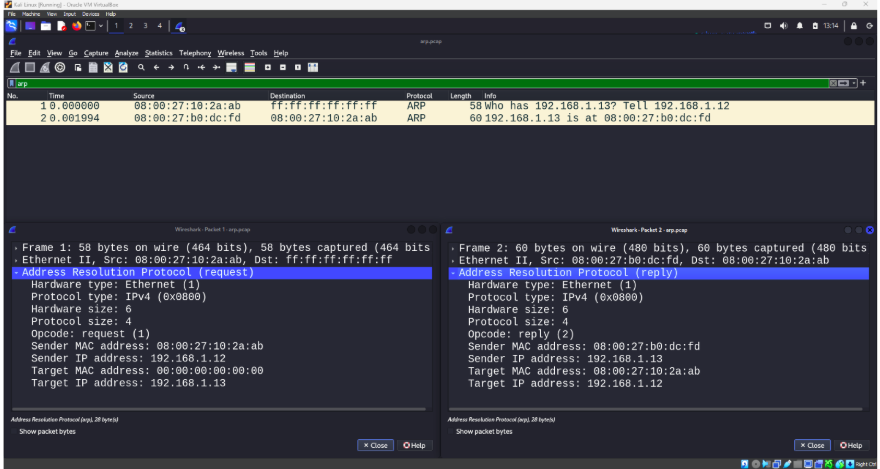
This ARP communication shows 192.168.1.12 sends a broadcast ARP request to find 192.168.1.13 (on the left) and accordingly, 192.168.1.13 responds with an ARP reply (on the right) to send its MAC address of 08:00:27:b0:dc:fd.
You can also use the following command to view the arp table:
$ arp -a
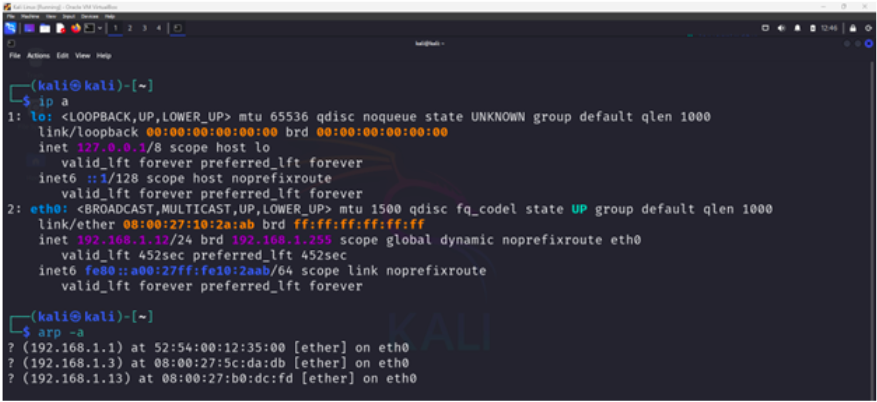
In this figure, we have a terminal on host 192.168.1.12 and print the arp table. We see that 192.168.1.13 is associated with 08:00:27:b0:dc:fd.
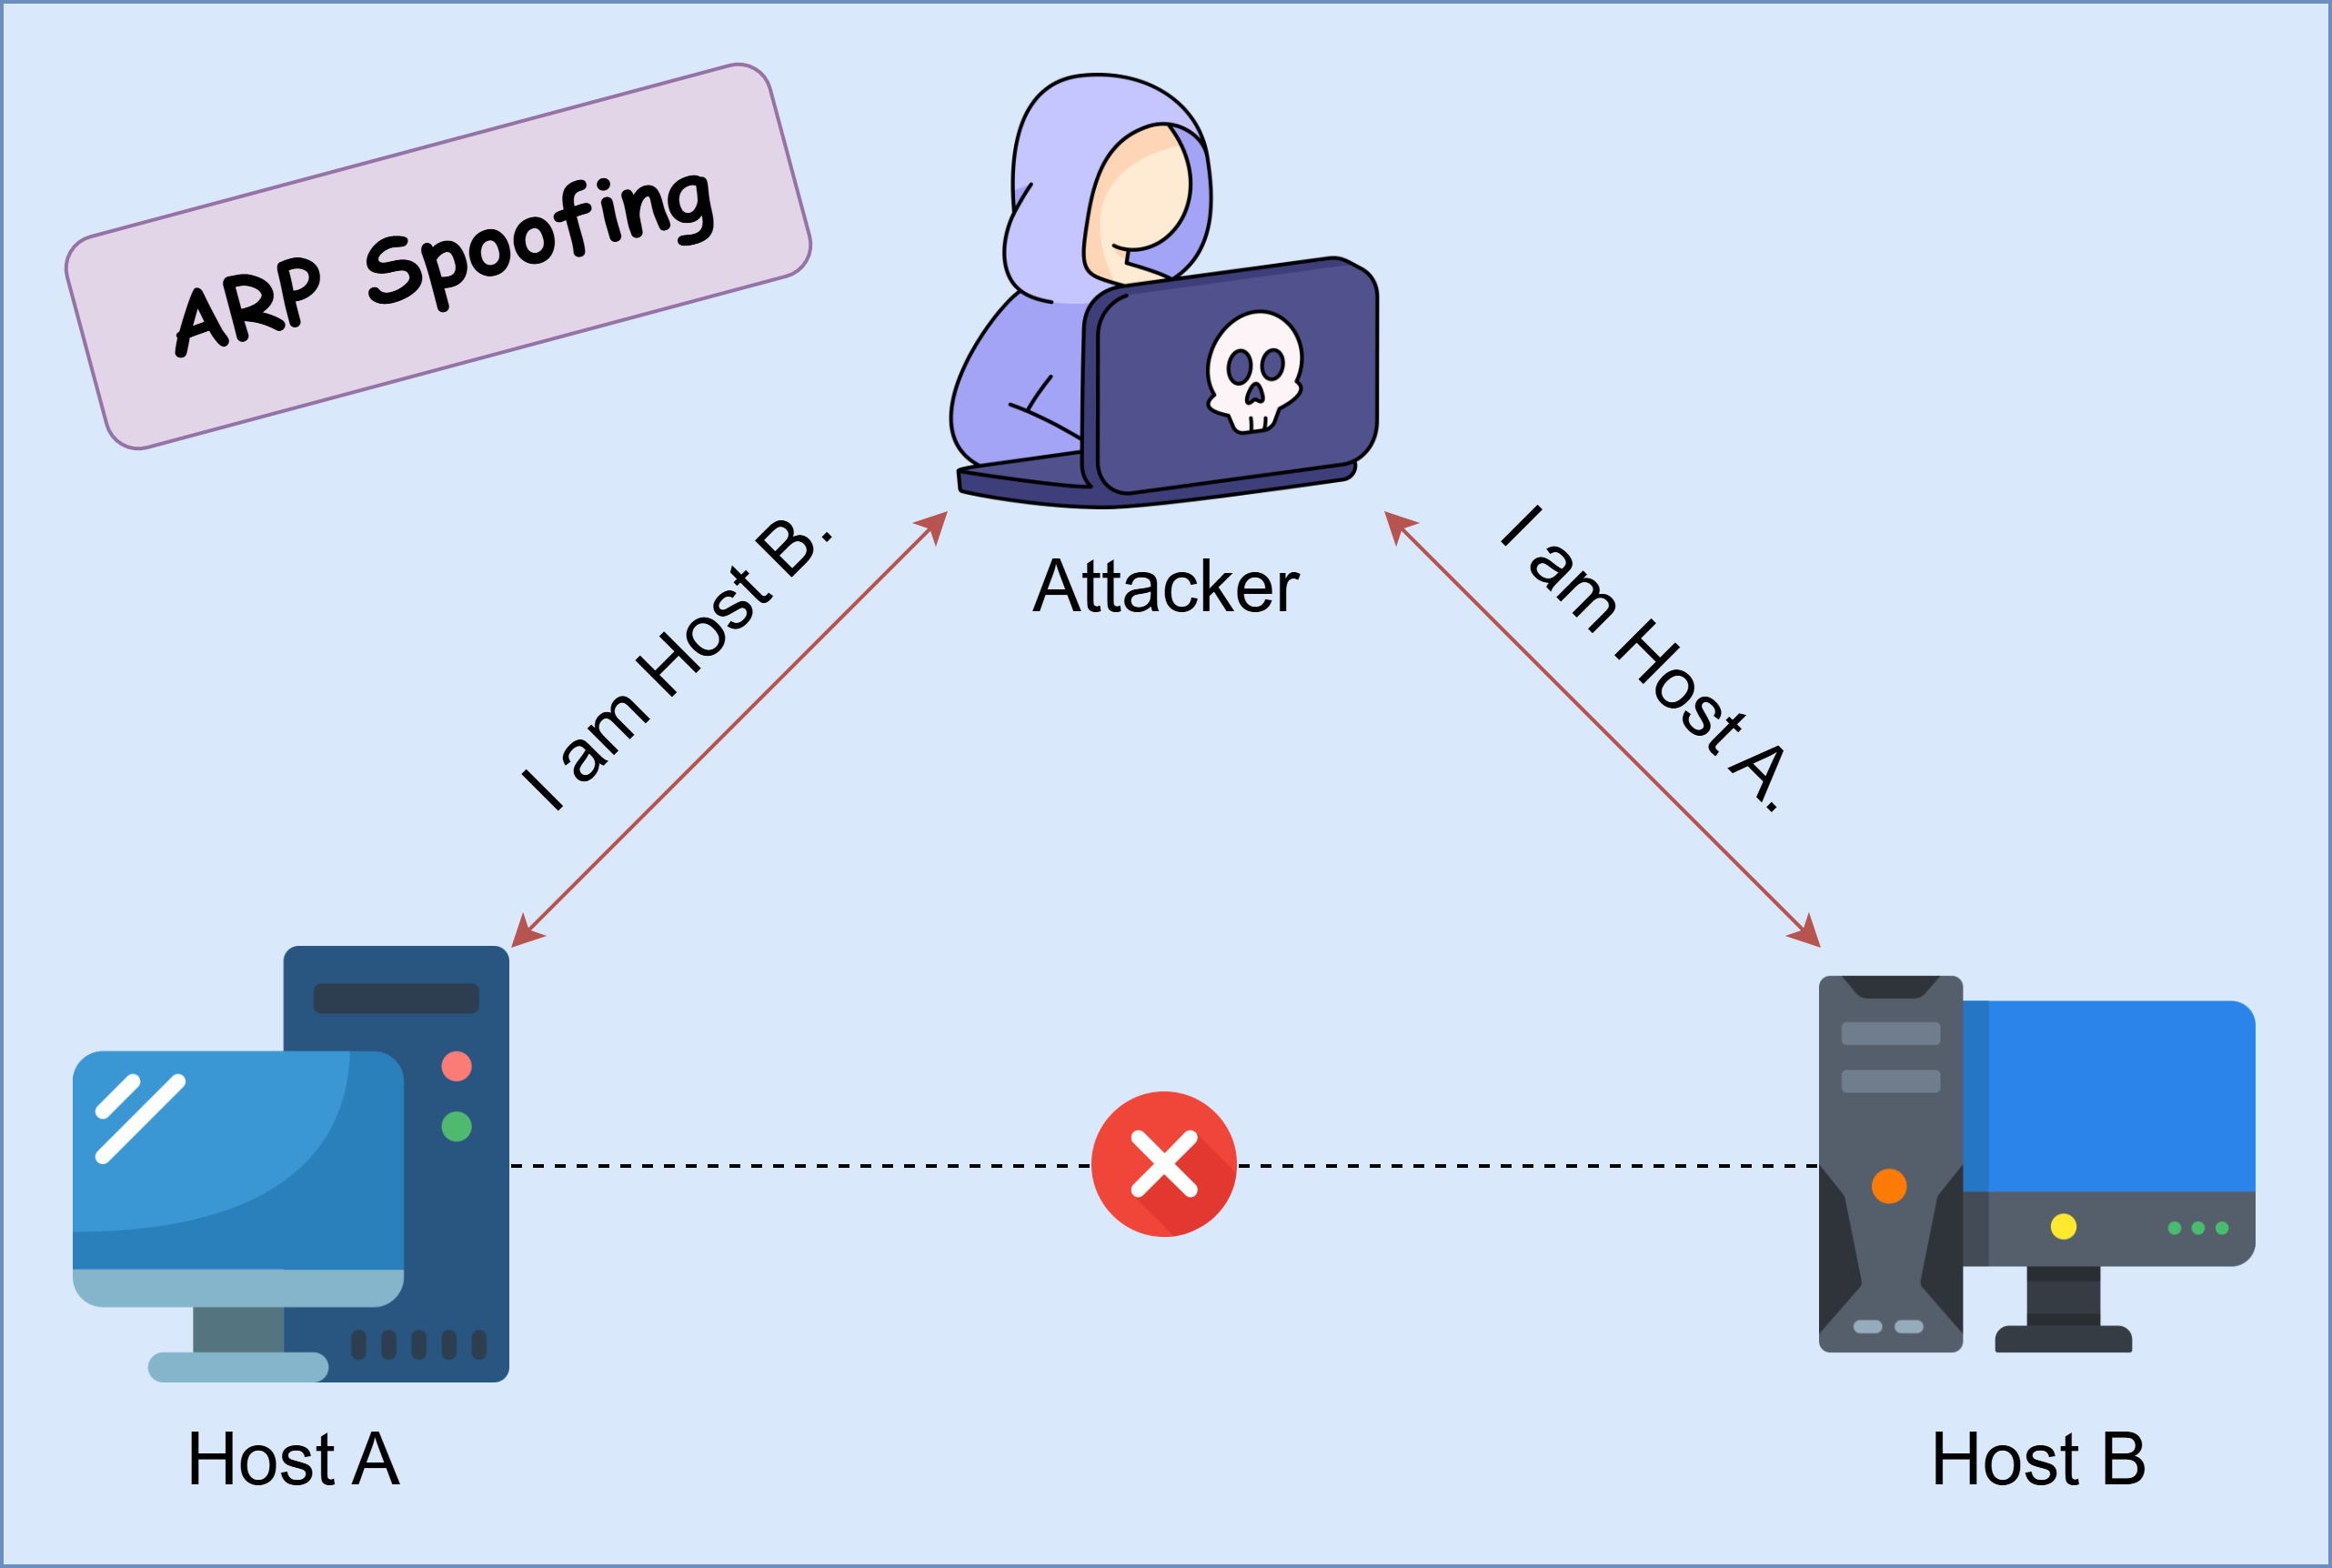
3. What is ARP Spoofing?
We previously discussed how devices send and receive ARP messages to track MAC-IP pairs within a network. Now, consider a scenario where a device starts sending fraudulent ARP replies to other hosts while spoofing the IP address of another device. In other words, it sends ARP replies that associate its own MAC address with the IP address of a legitimate host. This technique is known as ARP spoofing.
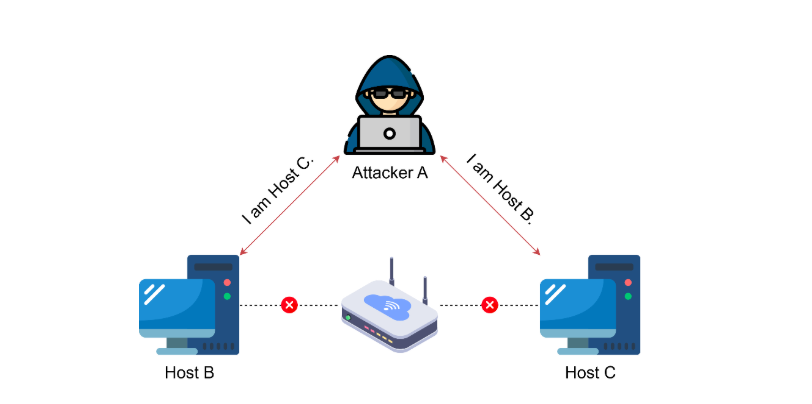
ARP spoofing can be exploited to perform Man-in-the-Middle (MITM) attacks, allowing an attacker to intercept and manipulate network communications. In this attack, the malicious actor sends forged ARP packets to deceive multiple hosts, making them associate the attacker’s MAC address with a legitimate IP address.
For example, suppose Attacker A wants to intercept traffic between Host B and Host C. First, A poisons B’s ARP cache by sending an ARP reply that falsely associates A’s MAC address with C’s IP address. Simultaneously, A sends a similar spoofed ARP reply to C, associating A’s MAC address with B’s IP address. As a result, both B and C unknowingly send their traffic to A, believing they are communicating directly with each other. This allows A to inspect, modify, or relay the traffic before forwarding it to the intended recipient.
By exploiting ARP spoofing, attackers can capture sensitive information, manipulate data in transit, or even conduct denial-of-service (DoS) attacks by dropping packets.
4. Hands-On with ARP Spoofing
To conduct an ARP Spoofing attack, you first need to set up your environment:
-
First, you need a hosted hypervisor such as VirtualBox to run your VMs [3]. It can be installed on all major Operating Systems (OS).
-
Second, you need two VMs for your experimental environment, one for the honeypot and another for the attacker machine. You can use Ubuntu [4] for your honeypot and Kali Linux [5] for your attacker VM.
-
Third, you need to create a NAT network on your VirtualBox and add your VMs to it [6]. Now, you have a proper setup to install and explore your honeypot.
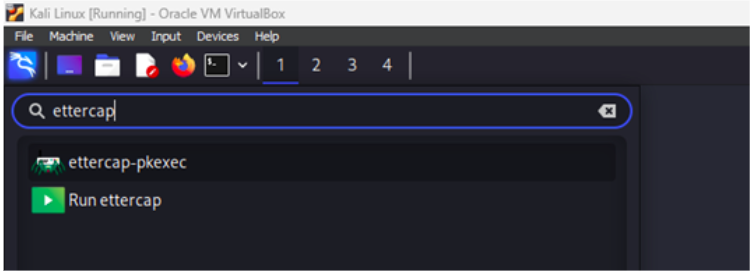
In this tutorial, we are going to use Ettercap which is a well-known suite for MITM attacks. First, on your attacker Kali Linux VM, open Wireshark and start capturing the network traffic. Then, open ettercap from the Applications menu on the top left corner.
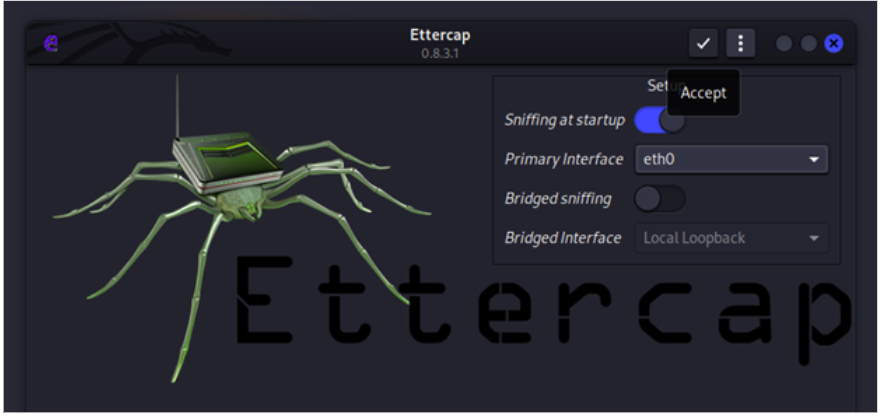
Next, from the top right corner, click on the tick button to accept the default configurations.
From the top left, click on the magnifier icon to scan for hosts.
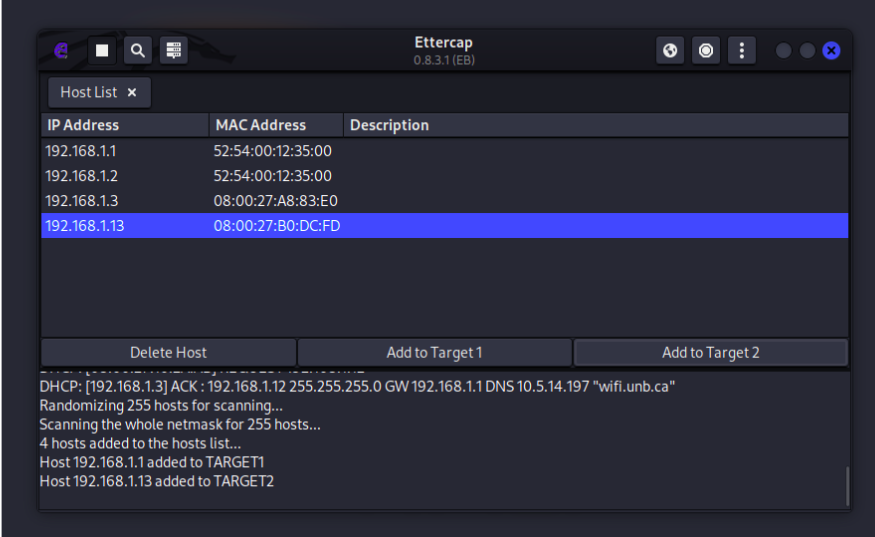
Click on the list icon to view the hosts list. Notice 192.168.1.1 as the router and 192.168.1.13 as the victim Ubuntu VM.
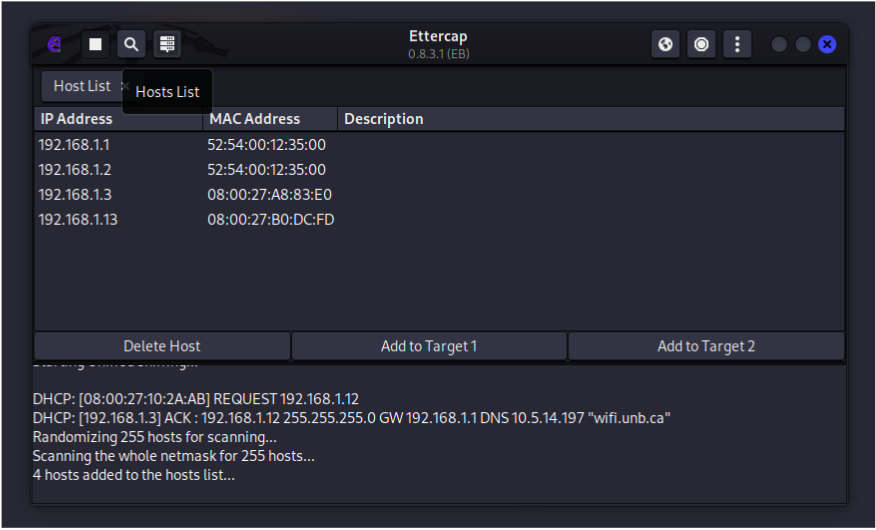
Click on 192.168.1.1 and then select “Add to Target 1”. Click on 192.168.1.13 and then select “Add to Target 2”.
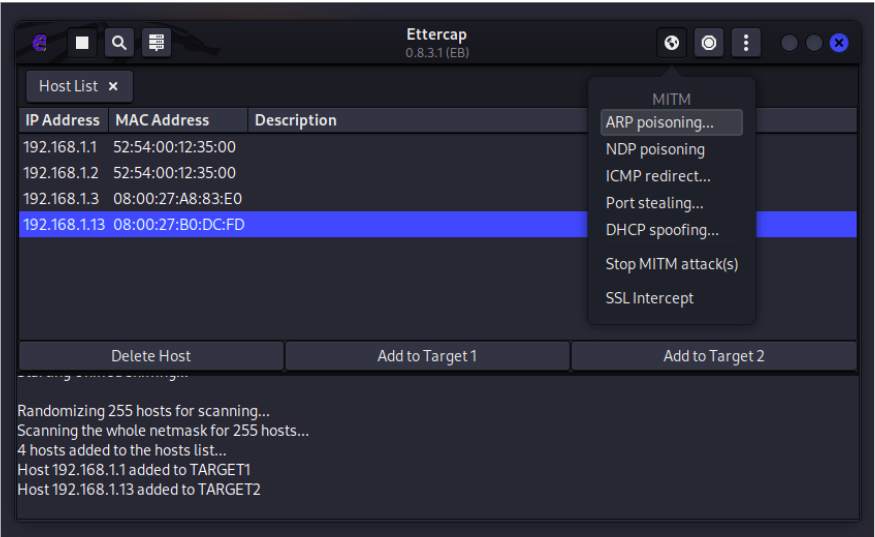
From the top right corner, choose ARP poisoning and then select OK. This will run the attack by sending fake ARP packets to the router and the victim to place the attacker between them.
Filter Wireshark for arp and find the fake packets that the attacker VM is sending to both targets. In this example, the attacker is first telling the router that he is 192.168.1.13 and also, telling the victim that he is 192.168.1.1 to place himself between the two.

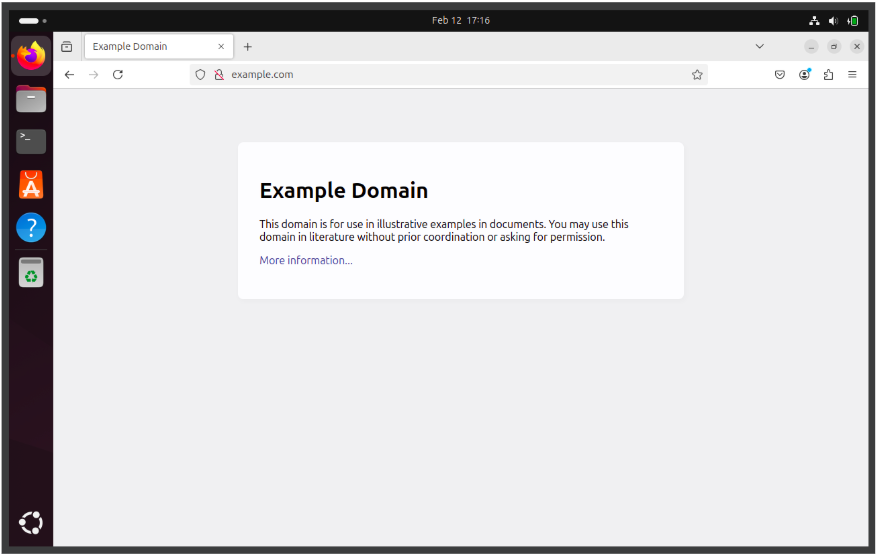
Next, open your browser on the victim Ubuntu and go to the following website:
Make sure you visit the http site to confirm you have conducted the MITM attack successfully.
Now, open Wireshark and apply the following filter:
ip.addr == 192.168.1.13 and frame contains "example"
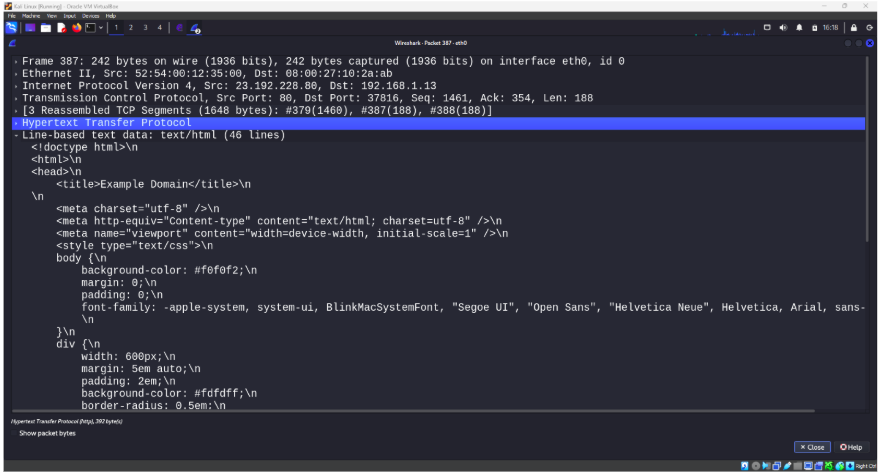
Then, look for the http packet with (text/html) content in the info column.
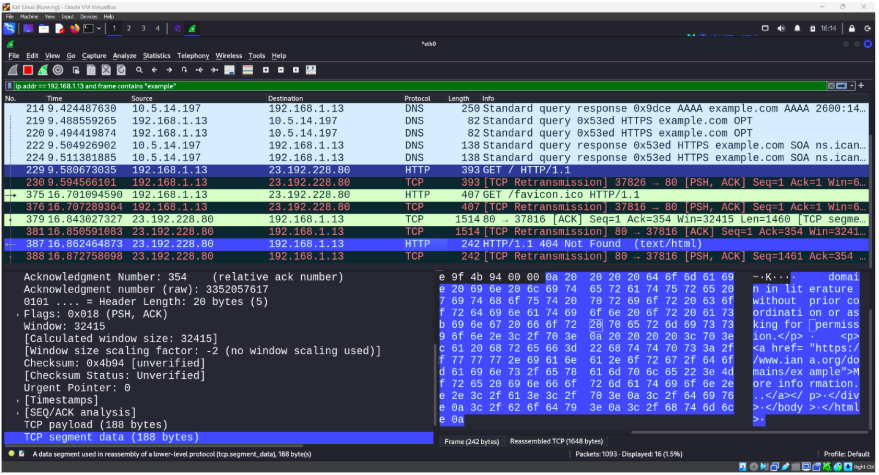
Double-click open the packet and view the html content retrieved by the victim.
Congratulations! You have done your first ARP spoofing attack. Please remember to conduct this attack in an environment that you own or you have permission to.
References
[1] NAKIVO, “How to Use VirtualBox: Quick Overview.” [Online].[Accessed: 18-Feb-2025].
[2] Canonical Ubuntu, “How to run an Ubuntu Desktop virtual machine using VirtualBox 7.” [Online]. [Accessed: 18-Feb-2025].
[3] Kali, “Kali inside VirtualBox (Guest VM).” [Online]. Available: [Accessed: 18-Feb-2025].
[4] techbeatly, “How To Create And Use NAT Network In VirtualBox.” [Online]. Available: [Accessed: 18-Feb-2025].
[5] Ettercap/ettercap, “How To Create And Use NAT Network In VirtualBox.” [Online]. Available: [Accessed: 18-Feb-2025].
Requirements: OSI Model, TCP/IP Protocol, Wireshark, Linux.
Edited By: Windhya Rankothge, PhD, Canadian Institute for Cybersecurity
Related Blogs: Threat Intelligence through Cyber Deception: A Beginner's Guide to Honeypots